
How to Square Stitch: Increasing and Decreasing

Square stitch lines your beads up in neat columns, so the finished piece looks just like woven fabric. Each new bead is stitched straight onto the bead below it, which makes it one of the easiest beadweaving stitches to read and fix.
This tutorial uses the same graphics as our kit instructions and how-to videos. First the basics, then how to make your rows wider (increase) and narrower (decrease).
What you'll need

Cylinder seed beads in two colors (we use Miyuki Delicas; alternating colors by row makes each row easy to see)
One bead in a contrasting color to use as a stopper bead
A beading needle and beading thread
Small scissors
A microfiber cloth or bead tray, so your beads don't roll away
Step 1: The basics
In square stitch, the beads lie on their sides in rows, and every new bead is stitched to the bead directly below it. We'll make a small block 4 beads wide.
1. Add a stopper bead. Pick up one bead in a contrasting color (ours is yellow) and slide it down, leaving a few inches of tail.

2. Lock it in place. Go through the stopper bead again in the same direction. It holds your first row in place and comes off later.

3. String row 1. Pick up all the beads for your first row. Here that's 4 blue beads.

4. Pick up the first bead of row 2. It will sit right on top of the last bead of row 1.

5. Stitch it in place. Go back through the bead below it, then through the new bead again. The thread makes a small loop that holds the two beads together.

6. Repeat for each bead. Pick up 1 bead, go through the bead below it, then through the new bead. Row 2 works back in the opposite direction.

7. Finish row 2. Keep going until every bead in row 1 has a partner on top.

8. Remove the stopper bead. Slide the stopper bead off the tail, then slide your work to the middle of the thread.

9. Strengthen the rows. Go back through all of row 1, then all of row 2. This straightens the beads and locks the two rows together.

10. Add more rows. Start row 3 the same way, on top of the end bead of row 2. Each row works back the other way.

11. Finished. Tighten your thread so the beads sit snugly together in straight columns.

How to increase (wider rows)
To make a row wider, you add a bead to both ends of the same row. This example starts with 2 rows of 4 beads and ends 6 wide.
1. Start with your thread at the end of a row. Here the thread comes out of the end of row 2.

2. Pick up 2 beads. The first bead extends row 2. The second bead sits on top of it and starts row 3.
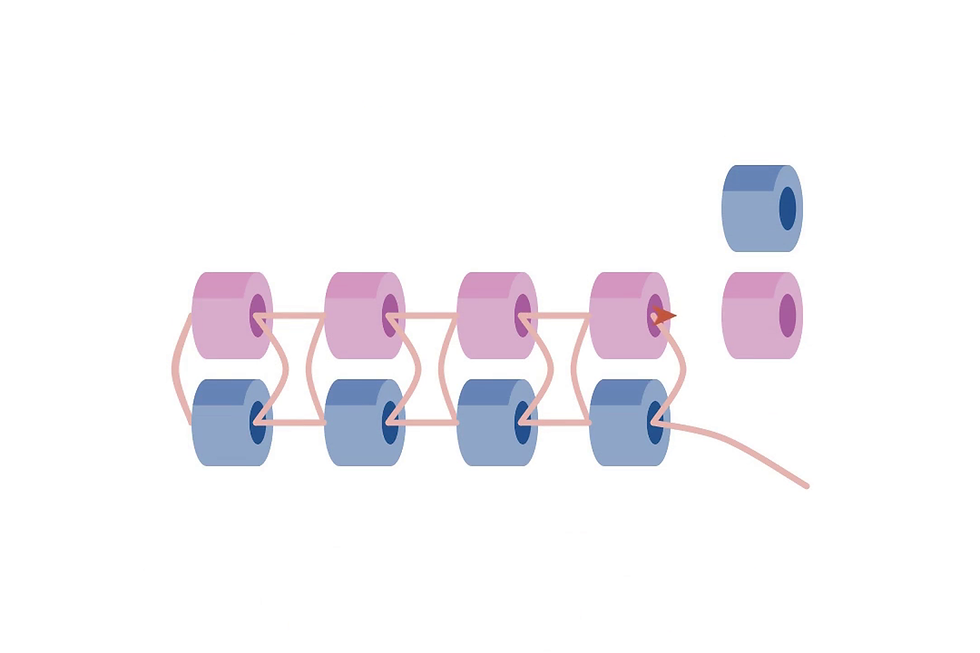
3. Circle back. Go back through the first new bead, then up through the second one again, so both new beads are locked in place.
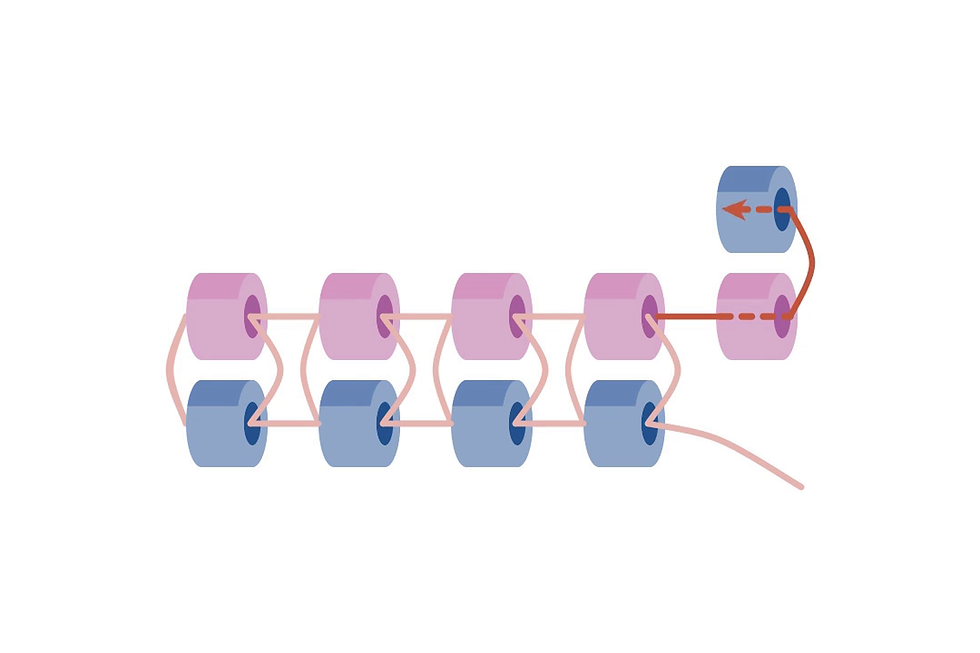
4. Stitch across the row. Finish row 3 with regular square stitch: pick up 1 bead, through the bead below, then through the new bead.
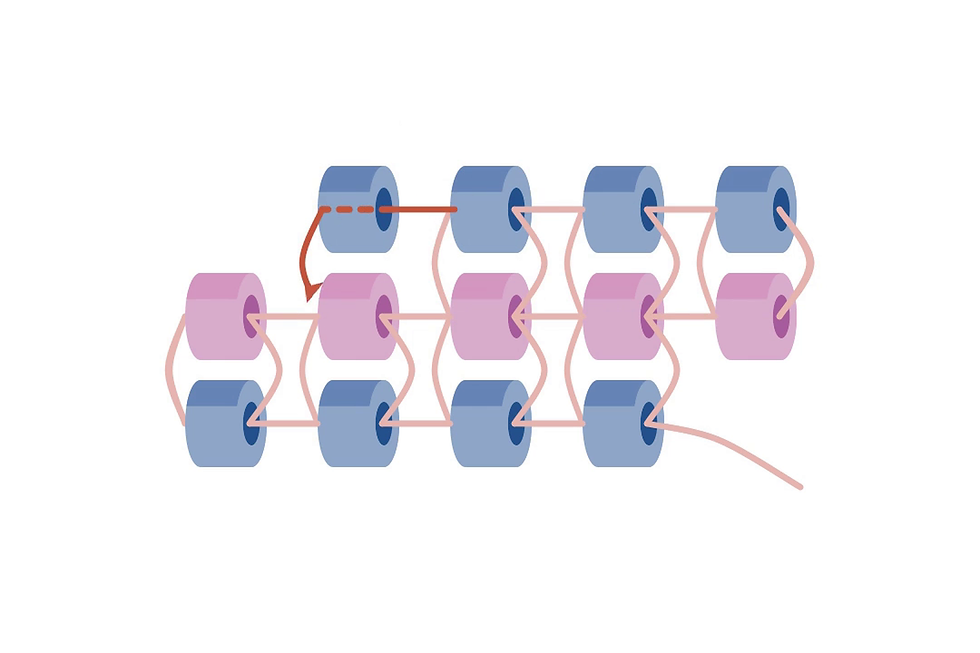
5. Mirror it at the other end. When you reach the other end, pick up 2 beads again. One extends row 2 on this side, and one finishes row 3.
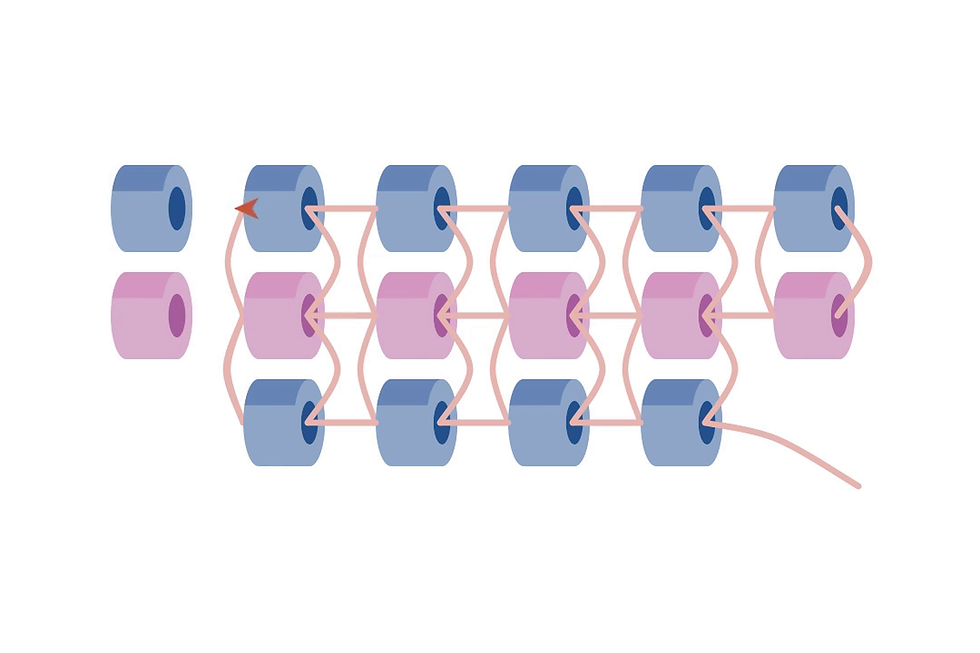
6. Circle back. Go through both new beads the same way to lock them.

7. Strengthen. Go back through rows 2 and 3 to straighten everything out.
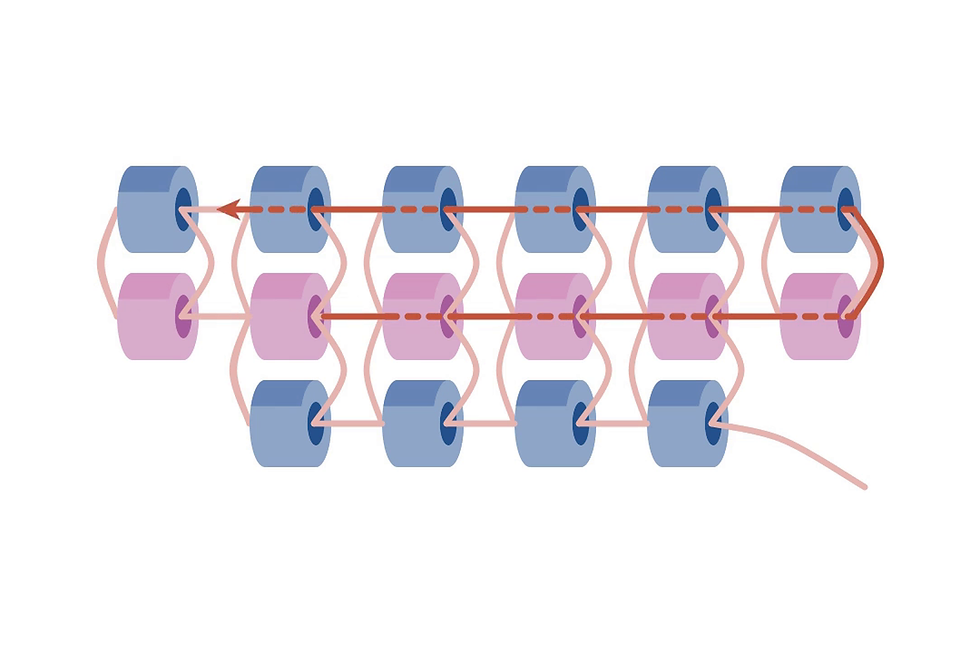
8. Finished. Rows 2 and 3 are now 6 beads wide, one bead wider on each side.
How to decrease (narrower rows)
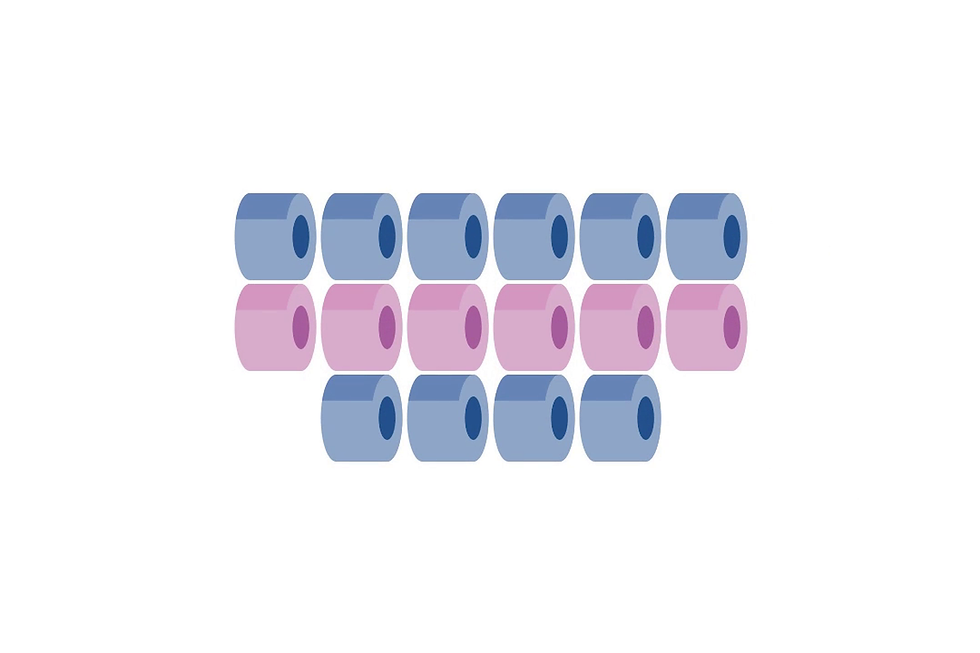
To make a row narrower, you leave out a bead at both ends of the same row. This example starts with 2 rows of 5 and ends with a row of 3.
1. Start with your thread at the end of a row. Here the thread comes out of the end of row 2.

2. Move your thread into place. Go through all of row 1, then back up through row 2 until you reach the bead under where the first new bead will go. This also strengthens the rows.
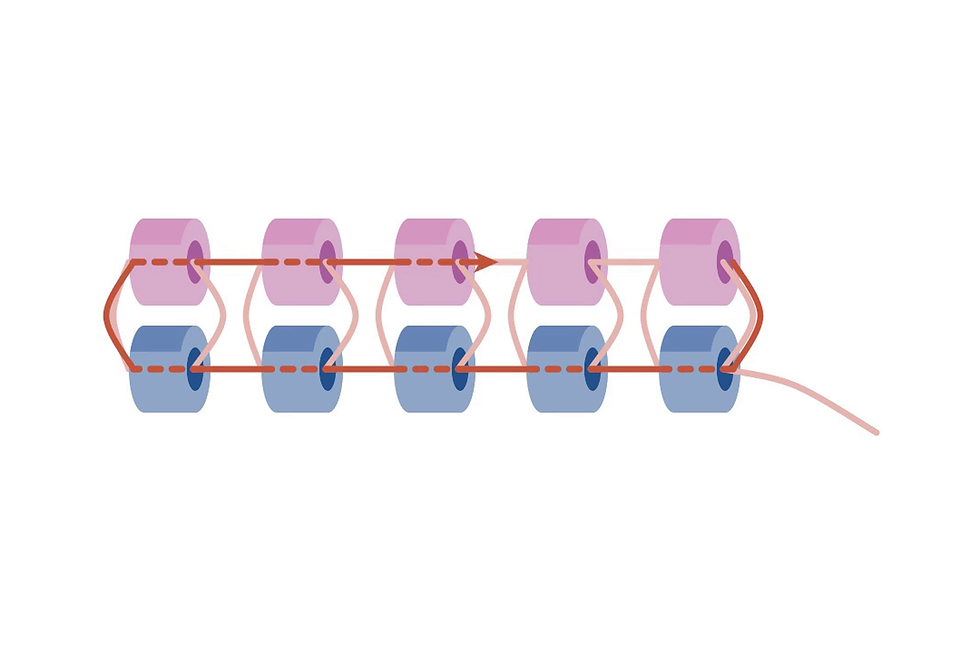
3. Add the first bead. Skip the end bead. Pick up 1 bead so it sits on the second bead from the end.
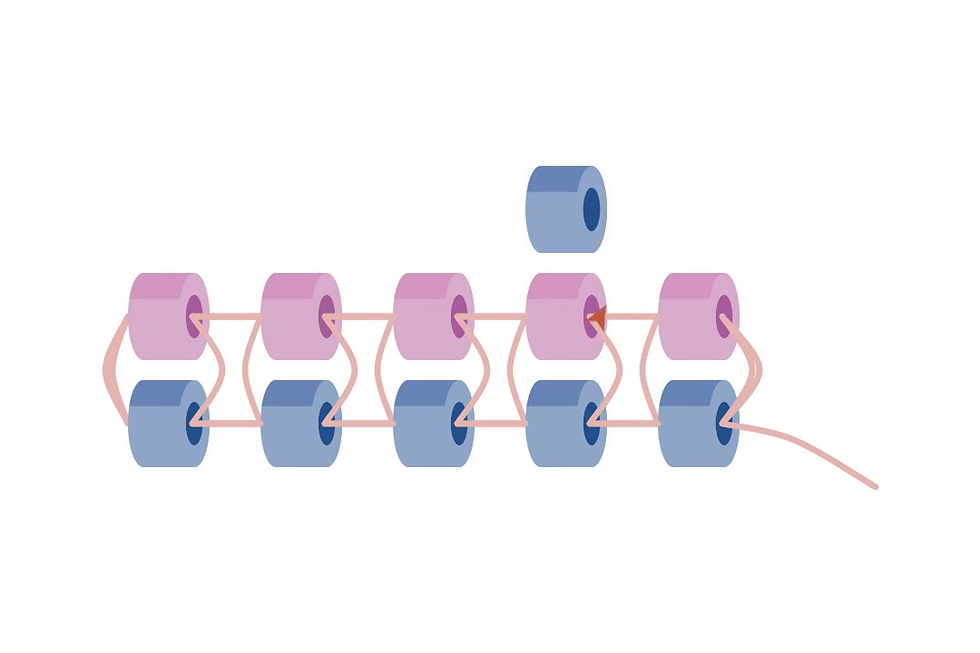
4. Stitch it in place. Go through the bead below, then back through the new bead.

5. Keep going. Add one bead at a time across the row.
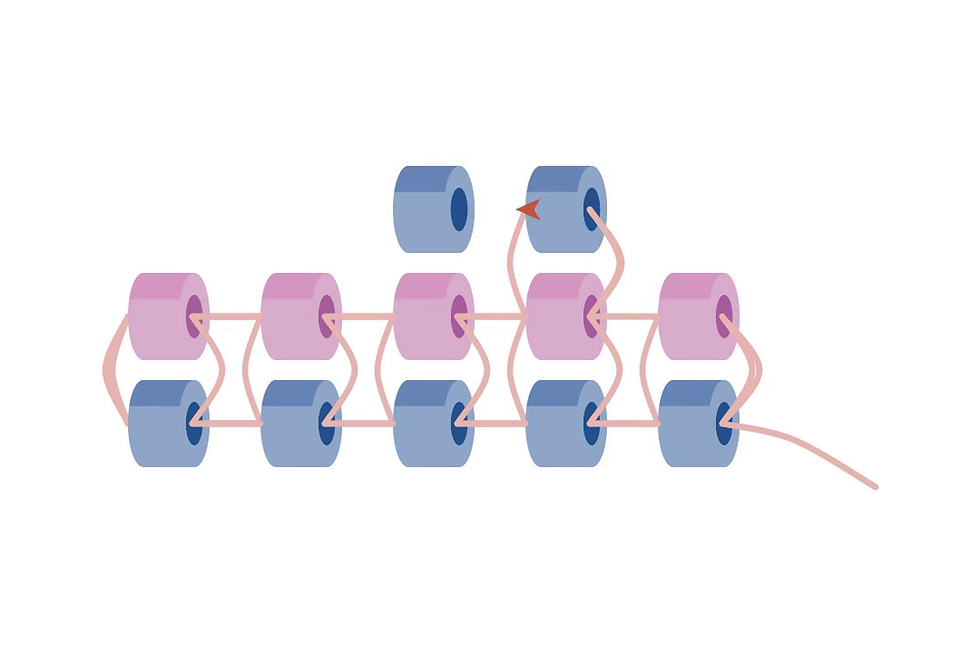
6. Stop one bead early. Leave the last bead of the row without a partner. Row 3 is now 3 beads wide.
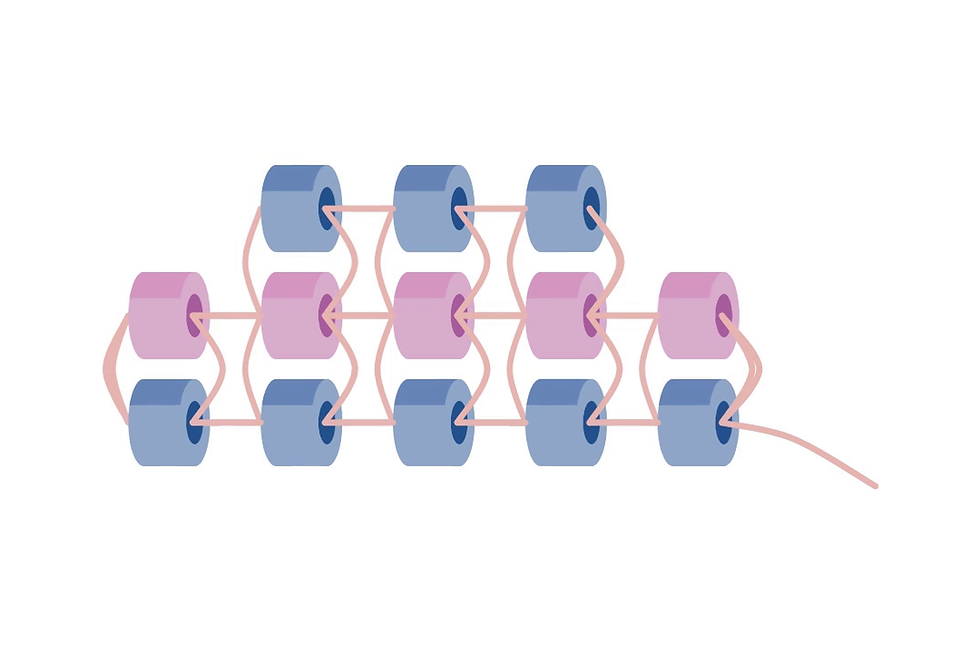
7. Finished. Each decrease row is one bead shorter on each side, which gives you a tapered shape.

A few tips before you start
Use two colors while you learn. Alternating colors by row makes it easy to see where you are.
Keep your tension even. Snug stitches keep the columns straight, but don't pull so hard the work curls.
Use a strengthening pass. Going back through finished rows makes square stitch sturdy and keeps the beads lined up.
Handmade isn't perfect. A slightly wobbly first block is part of learning something new.
Watch it in action
Prefer to watch? Each technique has a short video showing every pass of the thread. Follow us on Instagram, TikTok and YouTube for more beading tutorials.
Try it with a kit
Our earring kits come with everything you need: Miyuki Delica beads, a beading needle and thread, scissors, a bead tray, a microfiber cloth, gold frames and earring hooks, and illustrated instructions. Kits are launching soon at anyamariestudio.com.


Comments